Set up your account
Setting up your account is fairly easy. You just need to login to tellus.worldsibu.com.
Or create your profile on the same page.
Key concepts
You will need an environment to group the resources you design for your blockchain network (assets, transactions, forms, api keys). You can map these concepts as follows:
| Environment equals a Blockchain network | Instance equals an installation of Tellus |

Tellus works with a Blockchain network created with Forma, so that you don't have to go through the complexities of setting up the infrastructure.
Multiple organizations share an environment, and each of them has a Tellus instance installed running with a blockchain identity (certificate/wallet).
Install and deploy Tellus
In Tellus, you will need an environment and an Instance.
If you see this message, it means that your account has not been verified for access yet. Reach out to your account manager in case it doesn't get enabled in 1 hour.
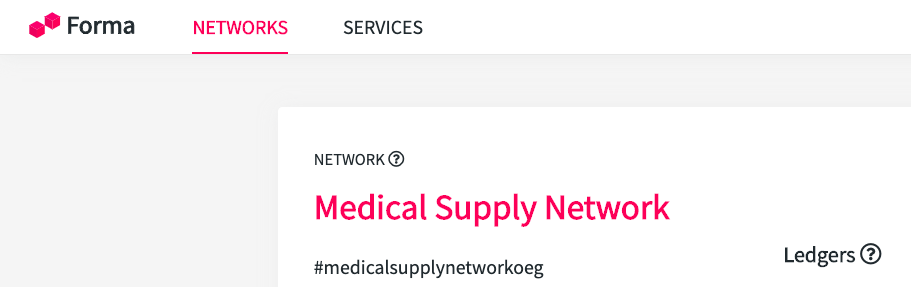
Head to tellus.worldsibu.com, click on Environments on the left menu and create a new one.
Make sure to select " Managed service with Forma"
Create a network in Forma
Now, you will need an account in Forma. Sign up here:
Be sure to use the same account (email address) in Tellus and Forma when signing up.
You have two main ways to create a blockchain Network:
Deploy Tellus
Now you have an account in Forma and another one in Tellus, both are linked by default. You also have an environment for your Assets and Transactions as well as a blockchain Network.
In Forma, you will need to actually deploy the smart contract and the instance (container) in the Tellus Cloud hosted by Forma.
Head to Services in the upper menu in Forma.
Click on New service and select Tellus.
In the form you will be asked a few details.

The target Network and Ledger to deploy the smart contract. The name of the smart contract that will be deployed. The identity service to use for your default instance connected to that smart contract.
And finally the Environment you created in Tellus before. Click on create proposal and follow the instructions.
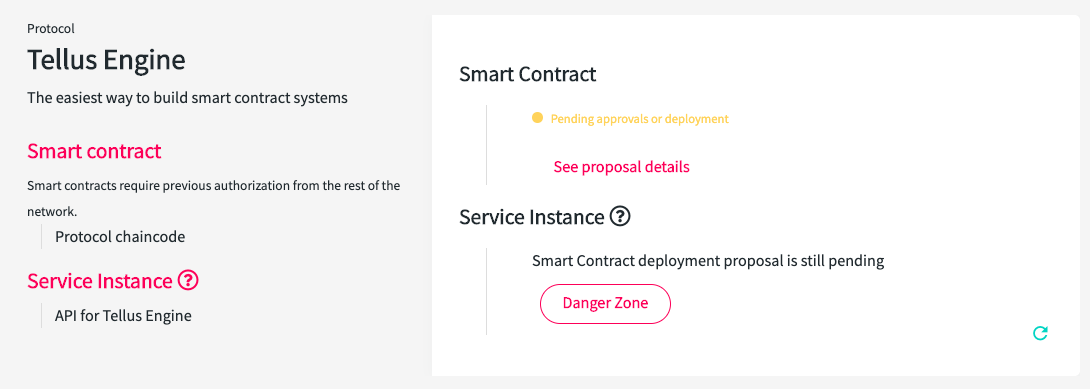
- You will need to first Deploy the smart contract. Click in the See proposal details link to continue the installation process.
- For that, if you created a Development Network you will be able to approve it right away.
- If you created a Multi-organization Network you will need them to sign in and approve the proposal.
-
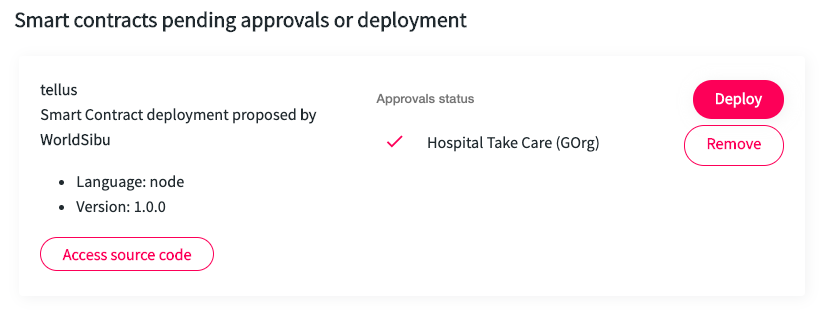
- Once the proposal is approved, click on Deploy and wait a few seconds (you'll get an email when the deployment process is ready).
- Now, go back to the previous tab (where you where deploying Tellus). And refresh the proposal with the refresh button in the bottom right.
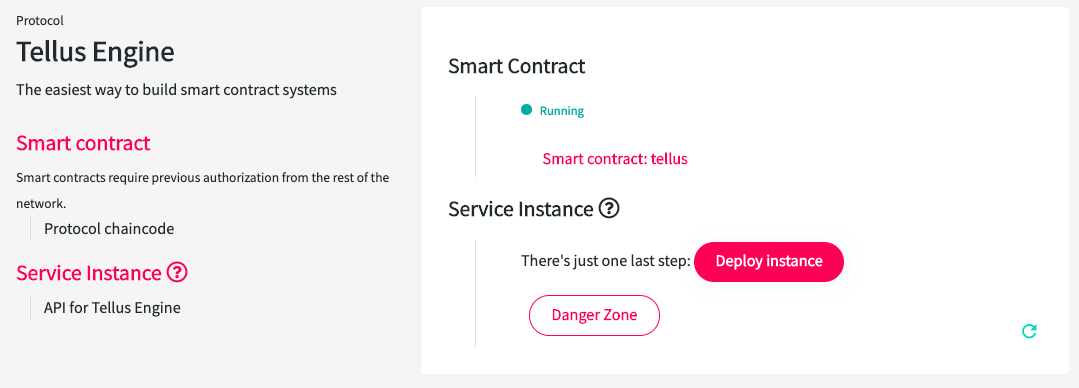
- Congratulations! 🎉 You have installed the Tellus smart contract successfully.
- Click on Deploy instance to finish the process. It will also take a few minutes and you can refresh again the section to see when it's ready.
- This will create a Tellus instance in the Tellus Cloud hosted by Forma that will give you access to the testing UI and the API. It will run on the identity created automatically for you.
Access your Tellus instance
Some coordinates here:
- You design Assets, Transactions, and Forms straight from the Tellus Console located in tellus.worldsibu.com.
- You will access the API and the testing UI from the same screen where you deployed Tellus, just click on Root Address.
- You will get a "Missing API Key" message the first time you access the URL. This is fine, it means that not everybody can access your workspace. You can create a API Key like this.
- You can explore the API Key like this. You will need your new API Address, take the same you see in your browser and add an "/docs" at the end. I.e.: http://35.196.106.209:PORT/docs
Adding extra Tellus Instances
Adding extra Tellus Instances allow you to simulate and work with multiple users (organizations, departments, etc) by using different certificates/wallets.
This is needed because of the certificate (identity) of each user that is stored in the servers. That new API and UI will run on the credentials of the user you select.
Go again to the Services tab. And create a New service again. This time, instead of creating a new smart contract, you will want to connect to the one you already instantiated and just add a new Tellus Instance.
In the Smart Contract section select Advanced settings and a new section will appear with the title Link to an existing smart contract, select the one you already deployed, and continue the process.
Head back to your console tellus.worldsibu.com and click the refresh button. You can now start creating your Assets and Transactions.