Google Cloud Platform

These are the required steps for you to successfully create a Kubernetes Engine Cluster on your own Google Cloud Platform account.
Prerequisites
- Download the Cloud SDK - https://cloud.google.com/sdk/
- Create a Google Cloud account.
Components you will need to create in your account
- Kubernetes Engine Cluster (Google Cloud Console)
- Firewall rule (Command Line Interface)
- Service Account (Command Line Interface)
Step by step tutorial
Create your Kubernetes Engine Cluster
Create a new project
Creating a new Project is a best practice as we will have some firewall rules and configurations that you'd like to isolate from the rest of your resources
Sign in to your Google Cloud account and create a Project.
Create a new cluster
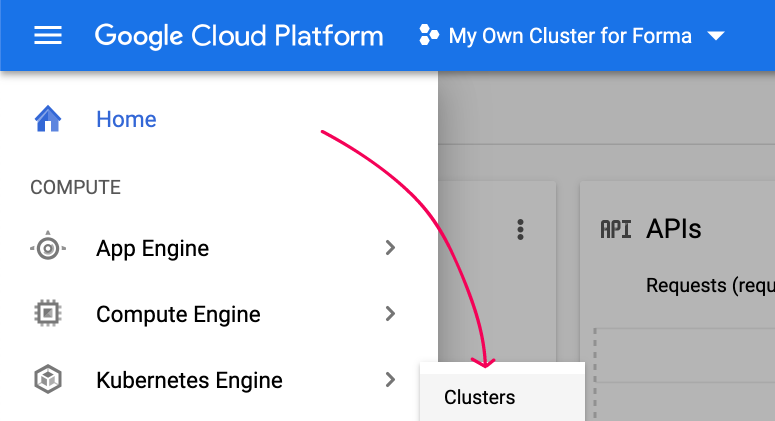
In the home page of that new Project, look for the Kubernetes Engine option in the left menu.
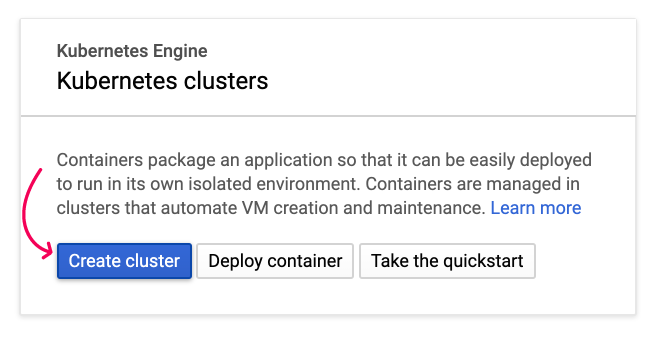
Fill the form (we recommend the following settings) and go to Advanced edit.

In the advanced settings fill the following fields (the rest of the settings can be kept with the default values). You can, of course, create bigger nodes for your cluster.
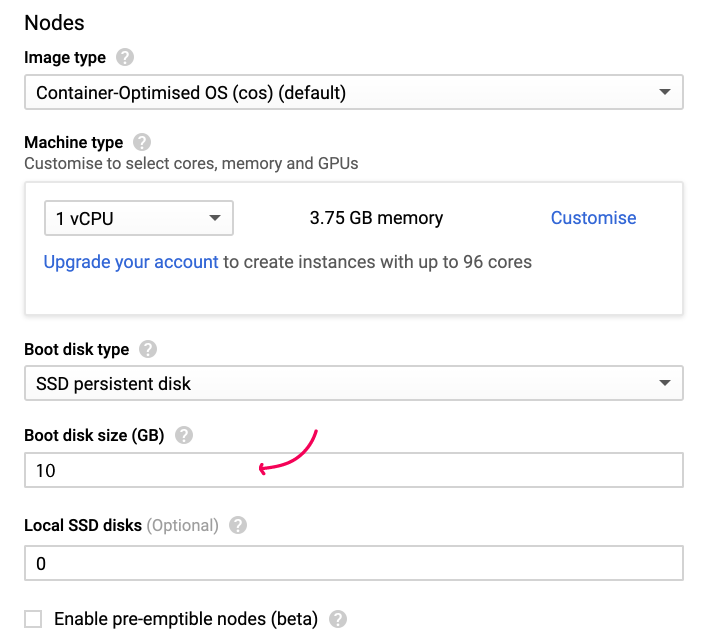
Save these advanced settings and let's change the network settings.
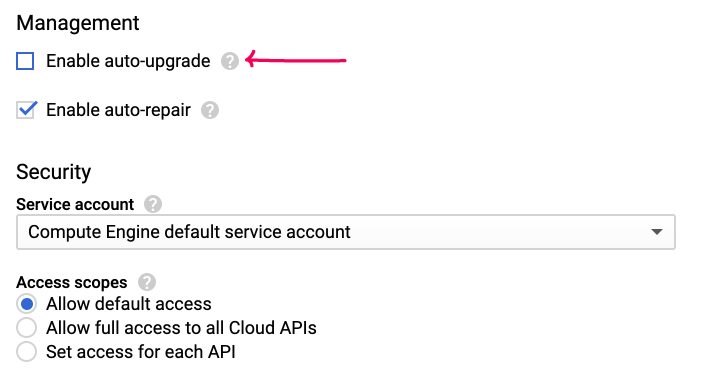
Set the availability maintenance window to a time you consider, unmark the HTTP load balancer and make sure to enable the certificate authentication setting.
Proceed to create your cluster!
A word about logs
Each container in the network generates logs that would help to troubleshoot issues, monitor health, and understand the general cluster's status.
There are three main options to handle them:
- You could just disable logs in Stackdriver: in this scenario, you would face charges over the storage and processing of logs however that means that you get no information about what's going on.
- Leave logs enabled on Stackdriver: this will make your account incur into charges. You could store logs for a period of time (default is 60 days) and keep them available for your access.
- Just store some logs: in this scenario, you could setup Stackdriver to store just some types of logs to reduce the amount of storage that logs take on your account.
You can enable or disable Stackdriver logs here when creating your cluster:
A word about storage
The cluster will occupy 10 Gb per node and 60 Gb to store the ledgers, certificates, and all the files for your environment.
Create a Firewall rule
Initialize the Google SDK
Install and initialize the SDK, under the install tutorial here go to Initialize the SDK title and then:
- Pick your newly created Project (in our tutorial it's called my-own-cluster-for-forma)
- Select the same region where you created your cluster.
If you get a permission denied message you can re-run the init command after restarting your console (close it an reopen it or run . ~/.bash_profile
Create the access rule
In the same console where you initialized the Google SDK - run the following command.
gcloud compute firewall-rules create test-node-port --allow tcp:30000-32000
Create your Service Account
Copy the Command-line access address from your cluster through the Connect button in the Web Console.
Forma needs some permissions to the infrastructure it accesses, that's why we have a set of best practices in place that you can follow. Read more about what access Forma needs and why here.
Go to your console and run it.
It may ask you to install kubectl and it will show you the command to install it.
Now, download this script that will help you to set up your required account (download file) so that Forma can access your cluster. Unzip its contents and run it like bash ./get-k8s-token.sh (make sure to point to the location where you downloaded the script file).
Copy and save the token that is shown once the script runs successfully.
Make sure you copy this token.
Setup your Forma Cluster
We will need some other values from your cluster. Head back to your Google Cloud account and enter into the cluster details (click the name of the cluster).
Copy the Endpoint IP - this will be your Kubernetes Cluster Address in Forma. Also, click on Show credentials to get the certificate to connect.

This certificate is the Connection certificate content in Forma.
The latest value is your Public External Cluster Address. Go to your console again and run kubectl get nodes -o jsonpath="PublicIP: {.items[0].status.addresses[?(@.type=='ExternalIP')].address}". This will get you the ExternalIP. Make sure to copy just the IP address and no other symbol.
Create a Cluster configuration in Forma
Login to Forma if you haven't yet forma.worldsibu.com. And fill the "How to connect" fields accordingly to the previous instructions.
You will need the Kubernetes Cluster Address and Public External Cluster Address you got before, as well as the Token and the Connection certificate content.
Save the cluster configuration and head back to the home of Forma to create a new Network.
Summary of the data you need to get Forma to talk to your Cluster
In general, this is the data you will need to create configure your Cluster in Forma is the following, we have created this table to help you map the concepts.
| In Forma | In Google | How to get it |
| Kubernetes Cluster Address |
Endpoint IP | From the web console in the Details tab of your Cluster. |
| Public External Cluster Address | External IP | You get it by running kubectl get nodes -o jsonpath="PublicIP: {.items[0].status.addresses[?(@.type=='ExternalIP')].address}" |
| Token | Token | You get it by running the downloaded script bash ./get-k8s-token.sh |
| Connection certificate content | Cluster CA certificate | From the web console in the Details tab of your cluster by clicking Show credentials. |