How to: Hyperledger Explorer

Hyperledger Explorer has some requisites (like Postgres) you need to meet in order to get it to work.
Preparations
Important: Make sure you have all prerequisites installed following the instructions from https://github.com/hyperledger/blockchain-explorer
- Clone https://github.com/hyperledger/blockchain-explorer.git
- Postgres can be troublesome in Mac - this article makes it easier: https://medium.com/@Umesh_Kafle/postgresql-and-postgis-installation-in-mac-os-87fa98a6814d
- Put special care to Database Setup and Build Hyperledger Explorer.
- Execute script to create the DB:
cd app/persistence/fabric/postgreSQL/db/ && ./createdb.sh
On Hurley
- Create the network with:
hurl new -o 3 -c 2 -u 2 - Hurley will generate files in ~/hyperledger-fabric-network/
Configuration for Hyperledger Explorer
- We need to configure blockchain-explorer/app/platform/fabric/config.json
- IMPORTANT: Don't use the default config.json, instead do the following:
- Rename config.json to config-bak.json
- Create a copy of config-balance-transfer.json and rename it to config.json (both files in the folder: ./app/platform/fabric/)
- Modify the configuration with the values in the file ~/hyperledger-fabric-network/network-profiles/org1.network-profile.yaml
- One easy way to do this is by going to https://codebeautify.org/yaml-to-json-xml-csv and converting from YAML to JSON and replacing the values of the field network-1 in the new config.json.
- Put special care to the "clients" object, as it has to follow the standard brought by the config-balance-transfer.json instead of the one brought by Hurley. Instead of just one client, it should be wrapped in a "clients" object. It should look like this:
"clients": {
        "client-1": {
          "organization": "org1MSP",
          "channel": "ch1",
          "credentialStore": {
            "path": "/Users/walter/hyperledger-fabric-network/.hfc-org1",
            "cryptoStore": {
              "path": "/Users/walter/hyperledger-fabric-network/.hfc-org1"
            }
          }
        }
      },
- Once values are correctly injected you are all set to start Hyperledger Explorer (./start.sh)
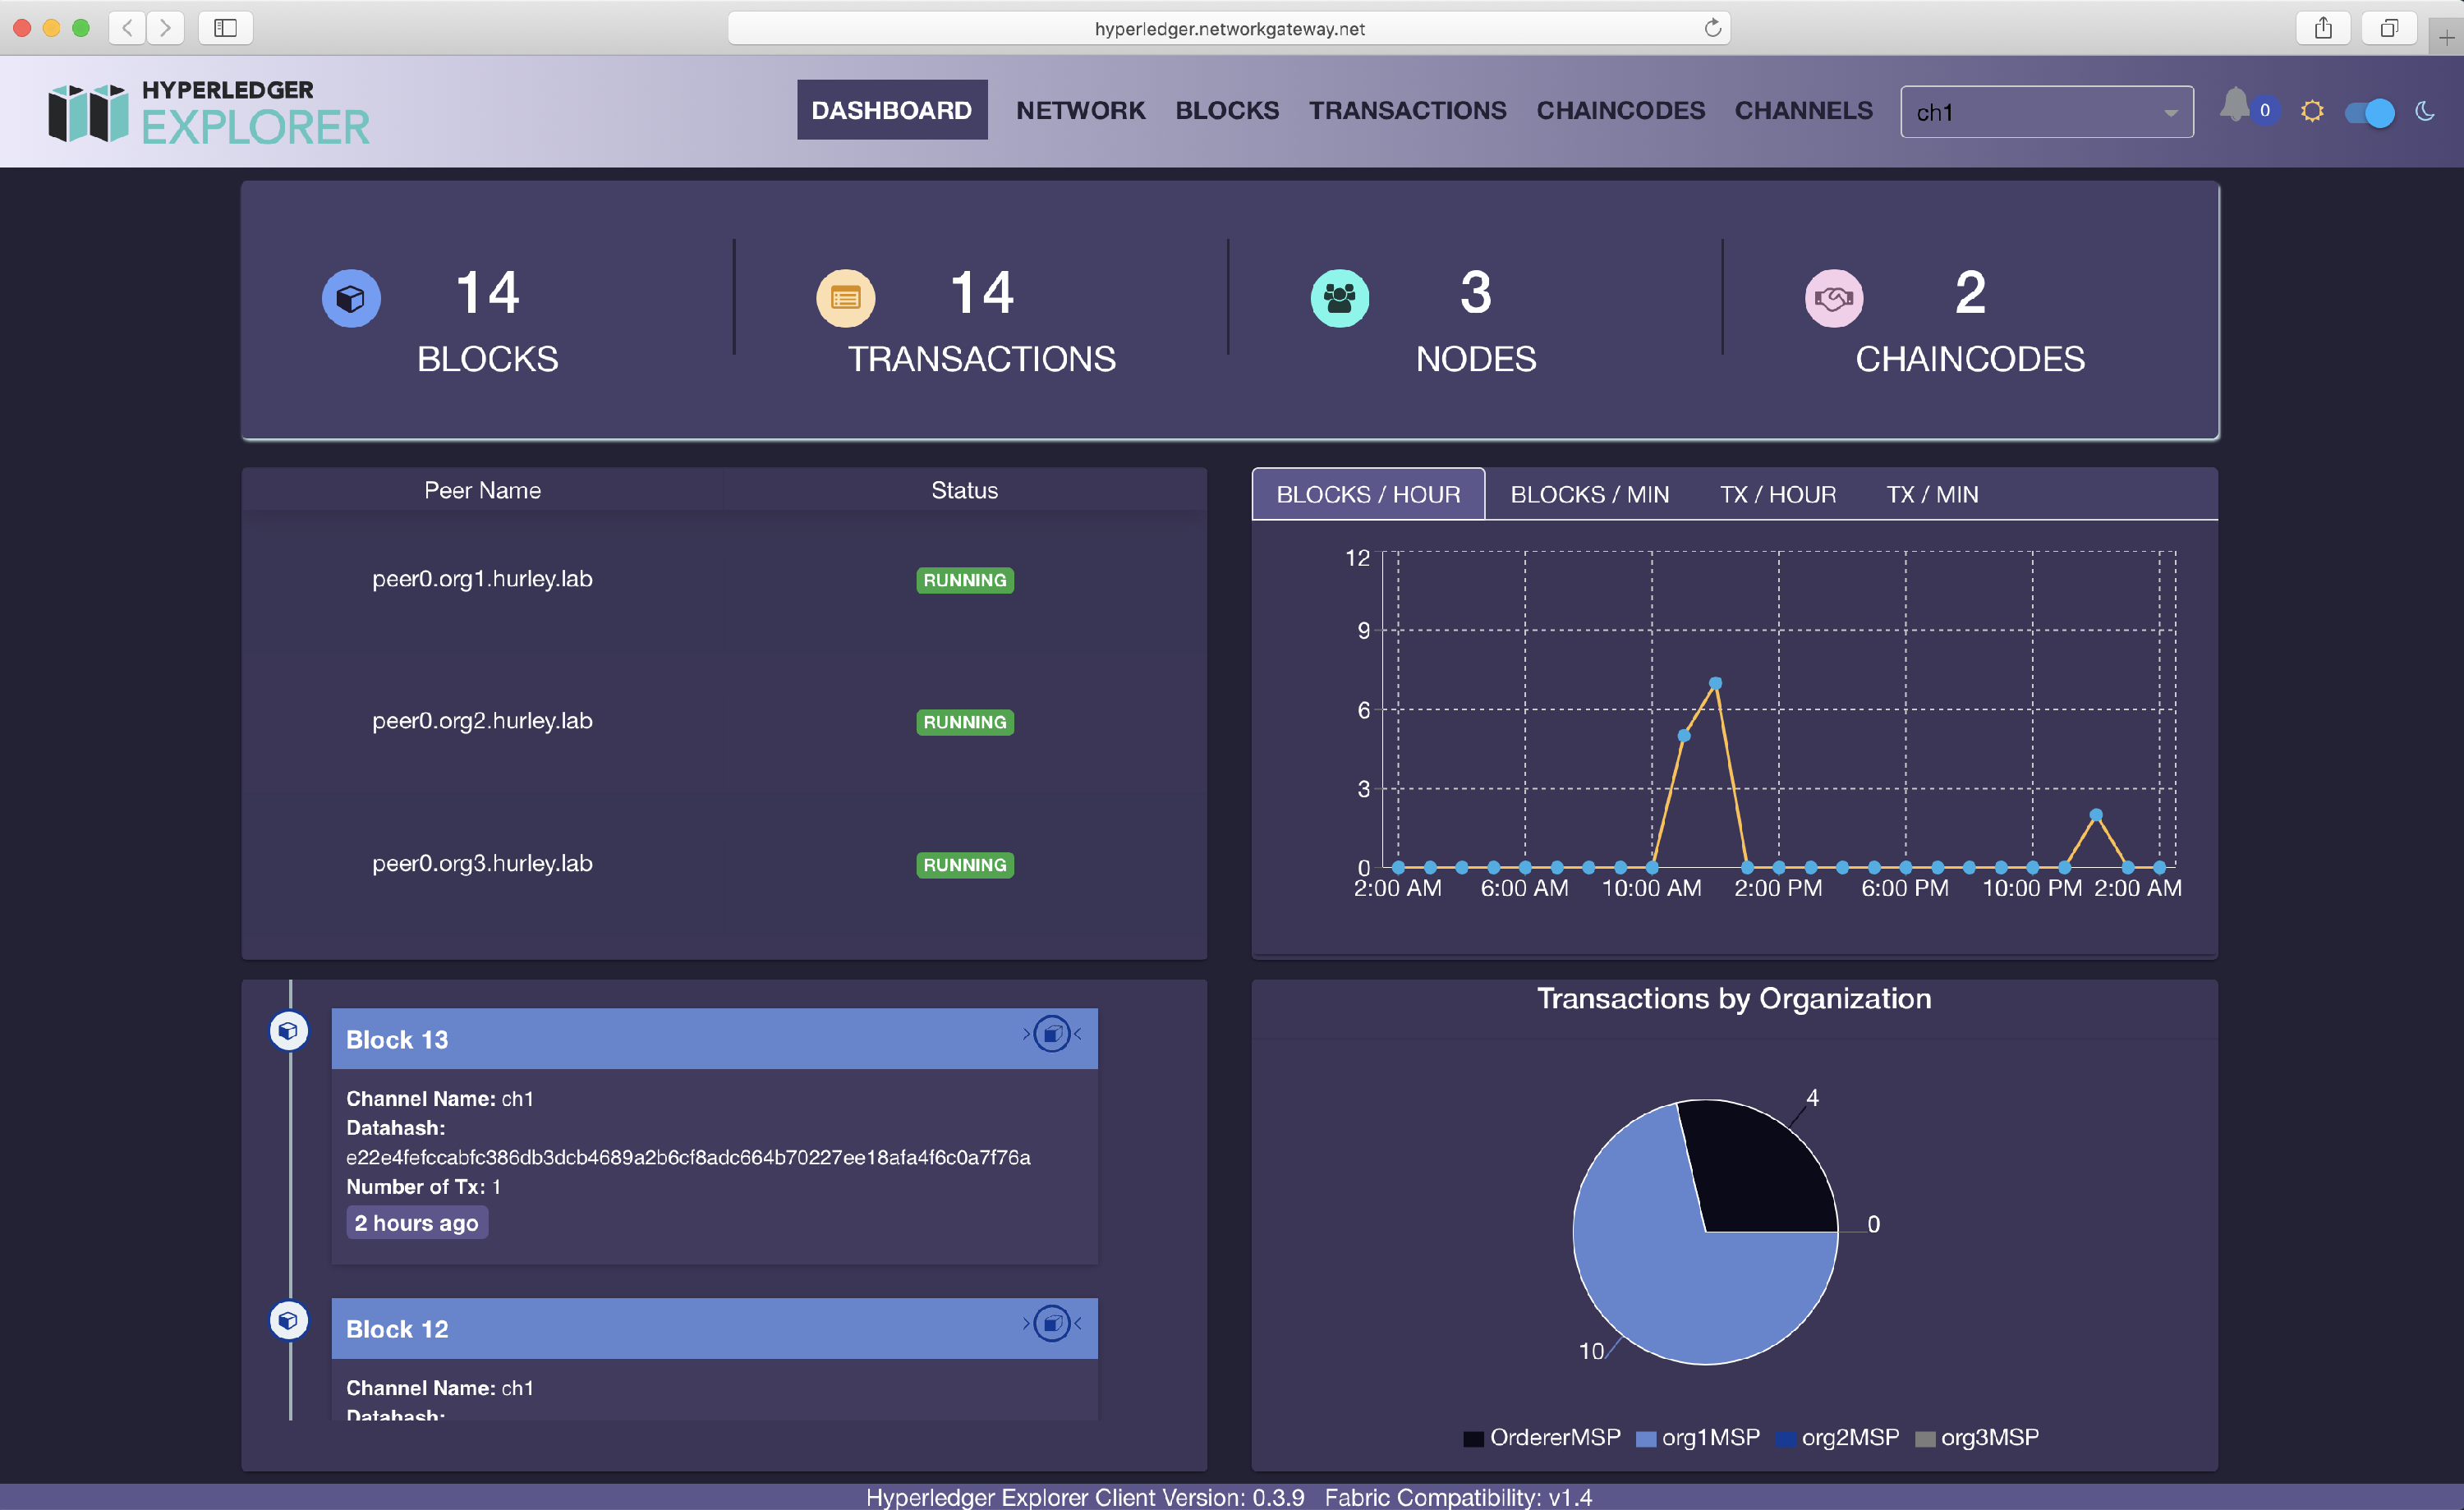
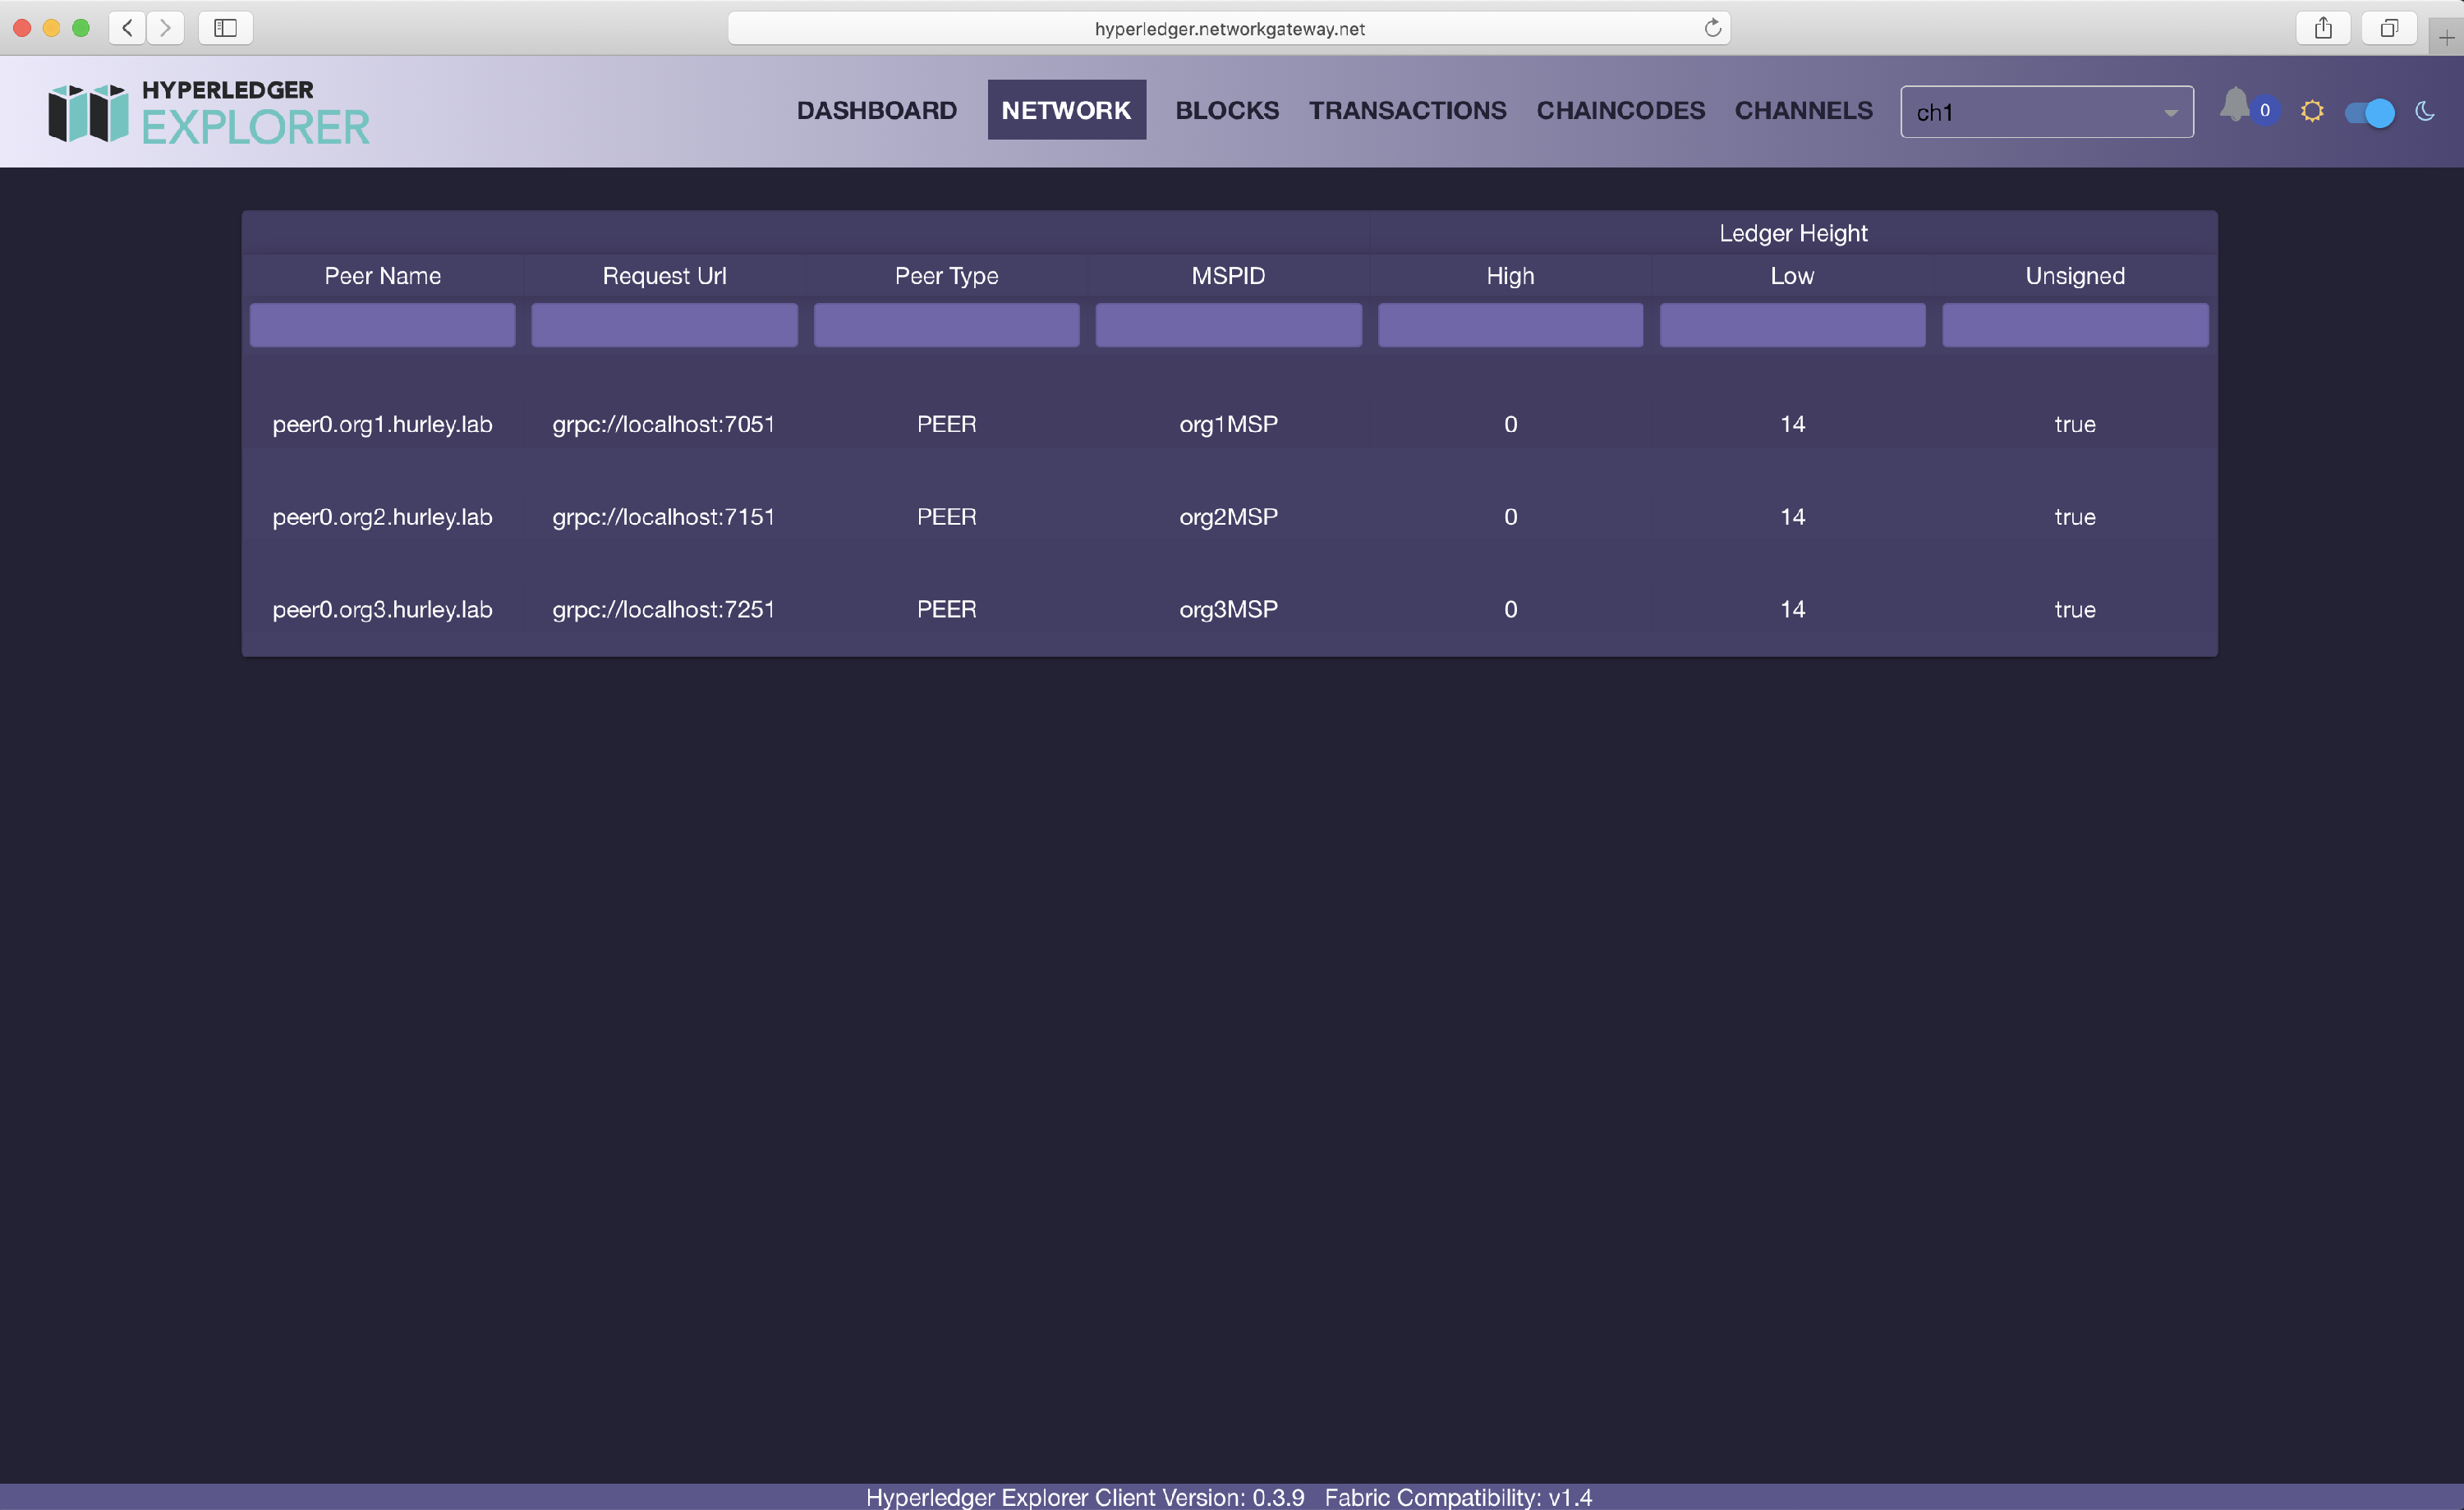
- Finally go to http://localhost:8080/#/ and enjoy! Also the API can be found here http://localhost:8080/api-docs
Special thanks to Alex Ramil Aguel for testing this out and putting the tutorial together!
Results should look like this